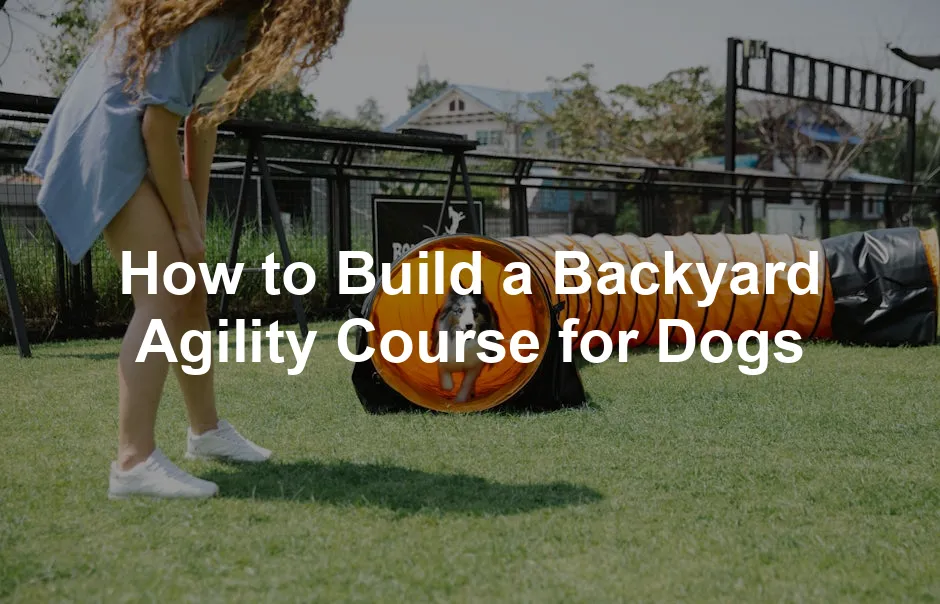
Introduction
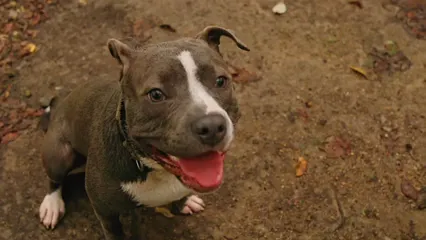
Building a backyard agility course for your furry friend is a fantastic idea! Imagine the wagging tails and joyful barks as your pup zooms through obstacles. These courses are not just fun; they’re a brilliant way to keep dogs physically and mentally stimulated. Agility training can enhance their health, behavior, and overall happiness.
Think of it this way: active dogs maintain better joint health. Carrie DeYoung from the American Kennel Club notes that regular activity helps keep fluid in their joints. This is essential for reducing the effects of aging. Plus, agility training isn’t just a workout; it’s a bonding experience. You and your dog will learn to communicate better through commands and signals, creating a deeper connection.
In this article, we’ll guide you on how to build a DIY agility course that’s not only enjoyable but also budget-friendly. Get ready to transform your backyard into an exciting playground for your dog!
Planning Your DIY Dog Agility Course
Assessing Your Space
First things first, let’s talk space! Measure your backyard to find the perfect spot for your agility course. Ideally, you want an area that’s flat and free from obstacles like rocks or trees. Make sure there’s enough room for your dog to maneuver freely between the obstacles. If space is tight, no worries! You can choose equipment that can be easily rearranged or stored away when not in use.
For larger yards, consider adding a cozy dog bed nearby for well-deserved rest breaks. Remember, a happy dog is a tired dog!

Understanding Your Dog’s Needs
Next, it’s time to consider your pup! Assess your dog’s size, age, and fitness level. Every dog is different, and this will influence the type of obstacles you choose. For example, smaller breeds may struggle with high jumps, while older dogs may need gentler challenges.
Also, consider your dog’s breed characteristics. Breeds prone to joint issues might not be suited for high-impact jumps. Tailoring the course to your dog’s specific needs ensures that every training session is safe and enjoyable. A dog harness for training can also help manage your dog’s movements during training, ensuring they stay safe and comfortable.
Setting Goals for Training
What do you want to achieve with this agility course? Are you aiming for competition or just casual fun? Setting clear goals will help guide your training sessions. For casual play, focus on having fun and building confidence. If competition is on your mind, work on improving speed and accuracy.
Encourage yourself to set realistic training goals based on your dog’s abilities. Remember, patience is key! Training should be a positive experience for both you and your dog. With a well-planned course, you’re on your way to some tail-wagging fun!
Choosing and Building Agility Equipment
Creating an agility course in your backyard is a thrilling adventure! The right equipment transforms your yard into an exciting playground for your dog. Let’s go over some essential obstacles to get your pup excited and moving!
Essential Obstacles
Weave Poles
Weave poles are a fantastic way to boost your dog’s agility and coordination. They require your dog to zigzag between poles, improving their flexibility and focus. Plus, it’s an entertaining challenge! You can easily make your own with PVC pipe, making it a budget-friendly option!
DIY Instructions:
- Gather materials: You can use PVC pipes, bamboo stakes, or old ski poles.
- Mark the spacing: Set the poles about 24 inches apart. This spacing helps prevent injury and allows your dog to weave comfortably.
- Insert the poles: Stick the poles firmly into the ground. If you’re using PVC, ensure they’re stable enough to withstand your dog’s energy.
And just like that, your dog is ready to show off their weaving skills!

Jump Bars
Jump bars are crucial for building strength, coordination, and confidence in your dog. They encourage your pup to leap over hurdles, enhancing their muscle development and agility. You can find a complete dog jump bar set to make things even easier!
DIY Instructions:
- Materials you’ll need: Get an old broom handle or PVC pipe, two sturdy chairs, and a pool noodle for cushioning.
- Set up the base: Position the chairs apart to create a jump frame.
- Create the jump bar: Secure the broom handle or PVC pipe across the chairs.
- Add cushioning: If using a pool noodle, cut it to length and place it on the bar for safety.
- Adjust the height: Start low and gradually increase the height as your dog becomes more confident.
Watch your pup soar with joy!
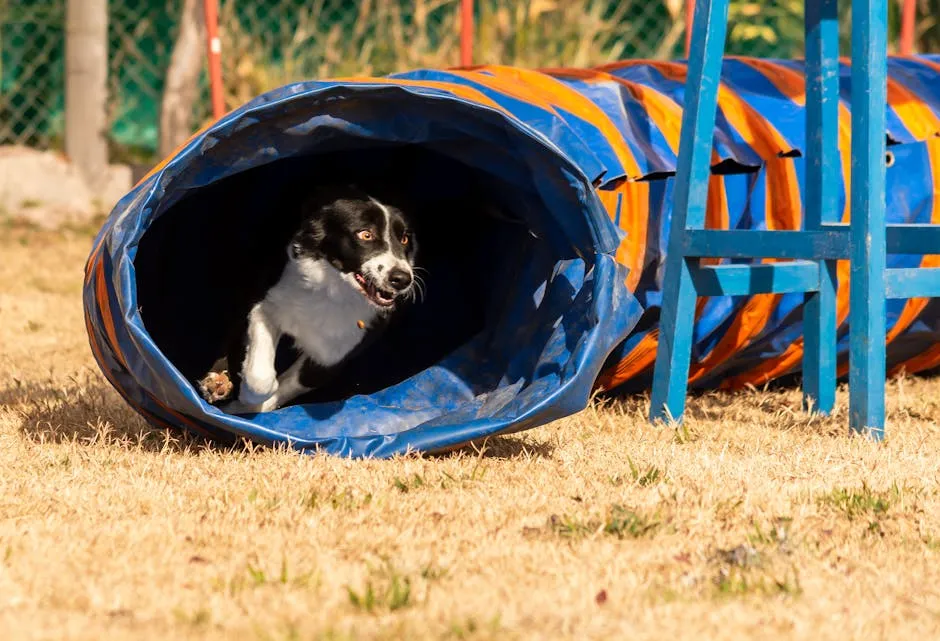
Tunnels
Tunnels are pure fun! Dogs love racing through them, making tunnels an excellent way to keep your dog engaged. They not only enhance speed but also encourage problem-solving. You can easily find a collapsible dog agility tunnel that’s lightweight and easy to store!
DIY Instructions:
- Use a collapsible children’s play tunnel if you have one. They’re lightweight and easy to store.
- If you’re feeling crafty, create a tunnel using tables and a long tablecloth. Just drape the cloth over the tables to create a tunnel-like structure.
- Encourage your dog to go through by using treats or toys as motivation.
Tunnels are sure to bring out your dog’s inner speed demon!
Teeter-Totter
The teeter-totter, or seesaw, is perfect for teaching balance and confidence. It challenges your dog to navigate shifting surfaces, enhancing their coordination. For safety, consider investing in dog agility teeter-totter equipment!
DIY Instructions:
- Gather materials: Use a sturdy plank of wood and a solid base. You can create a base using two large logs or PVC pipes.
- Create a pivot point: Mark the center of the plank and attach it to the base with a strong bolt, allowing it to pivot smoothly.
- Secure the ends: Make sure the ends of the plank are stable and won’t tip over during use.
- Test the balance: Before letting your dog try, ensure the teeter-totter is stable and safe for your furry friend.
With practice, your dog will gain confidence in their balance!
Building these agility obstacles at home not only provides your dog with physical exercise but also strengthens the bond between you two. Plus, it’s a great way to unleash some creativity! Happy building!
Additional Obstacles
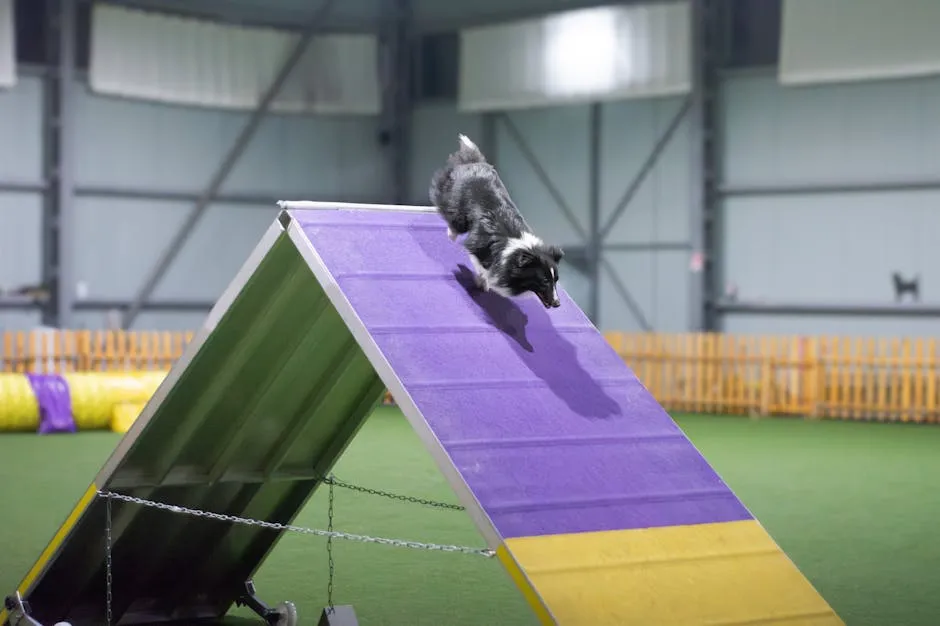
A-Frames
The A-frame is a classic agility obstacle that challenges your dog to climb. It consists of two ramps joined at the top, forming an “A” shape. This obstacle is fantastic for building strength and boosting confidence. Climbing up and down helps improve coordination and balance, making it a favorite among many pups. You can find ready-made options like the dog agility A-frame for convenience!
DIY Construction Tips:
- Materials Needed: Use plywood for the ramps and sturdy wood for the frame.
- Dimensions: Cut two pieces of plywood, each about 4 feet wide and 4-5 feet long. Adjust the height based on your dog’s size.
- Frame Assembly: Create a triangular frame using 2x4s as supports. Ensure it’s stable and secure before letting your dog try it out.
- Surface Treatment: Add non-slip tape or paint to the ramps for better grip.
- Test Stability: Before your dog uses it, make sure the A-frame can handle their weight without wobbling.
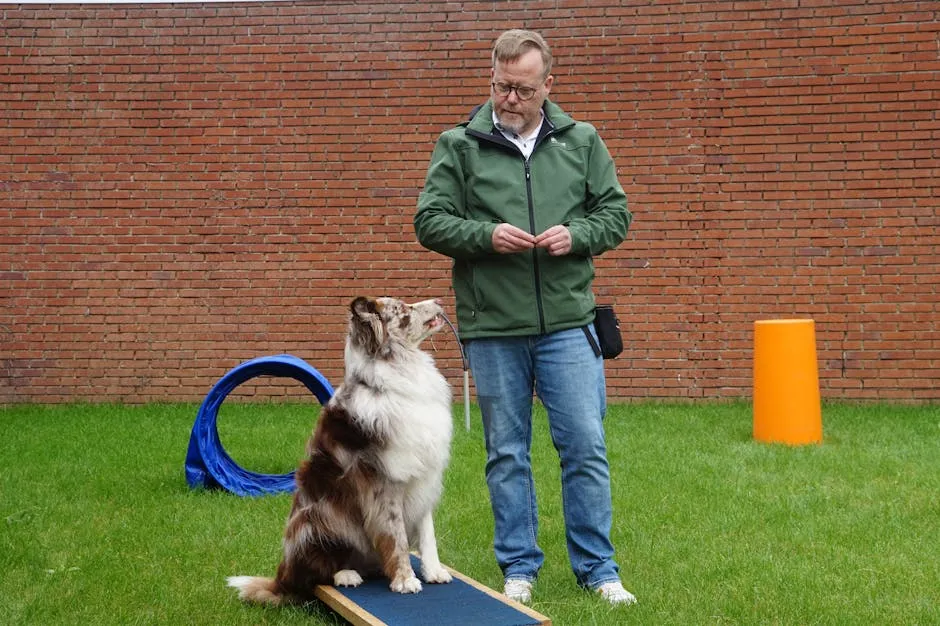
Pause Tables
Pause tables are platforms where dogs stop and hold their position. They teach control and patience, which is vital in agility training. Dogs learn to focus and listen to commands while on the table, reinforcing good behavior. A dog agility pause table can help streamline this training process!
Instructions for Building a Simple Pause Table:
- Materials Needed: Find a sturdy, low table or make one using plywood and 2x4s for support.
- Dimensions: Aim for a table that is about 24 inches high and 4 feet long. Adjust the size based on your dog’s stature.
- Build the Base: Use 2x4s to create a solid frame. Ensure it’s stable and can hold your dog’s weight without tipping over.
- Surface Treatment: Cover the top with AstroTurf or non-slip material for comfort and grip.
- Introduce Gradually: Start by encouraging your dog to hop on and off using treats. Praise them when they pause for a few seconds.
Setting Up Your Course
Designing the Layout
Designing your agility course should be as fun as it is strategic! Start by mapping out different layouts to keep training interesting. Mix up obstacles from jumps to tunnels, ensuring variety in height and difficulty. This keeps your pup engaged and challenged.
Avoid placing similar obstacles next to each other. For instance, if you have a jump bar, don’t put another jump right next to it. This way, your dog won’t get bored or frustrated. Instead, alternate between contact obstacles like A-frames and non-contact ones like tunnels. A well-thought-out layout can turn your backyard into an exciting training haven.
Safety Considerations
Safety first! An agility course should be a fun and secure place for your dog. Start by checking that all equipment is stable and securely anchored. Jump bars should be adjustable and set to a height suitable for your dog’s size to prevent injuries. Don’t forget to have a pet first aid kit on hand for emergencies!
Always monitor your dog’s behavior during training. If you notice fatigue or reluctance, give them a break. Regularly inspect all obstacles for wear and tear. If anything looks unstable, fix or replace it before your dog uses it. Remember, a safe course leads to happy, confident pups ready to conquer any challenge!
Training Your Dog on the Agility Course
Introduction to the Course
Introducing your dog to the agility course is like throwing a welcome party! Start by letting them sniff around. Curiosity is key! Allow your pup to explore each obstacle. This helps them feel comfortable. Remember, patience is essential. Don’t rush the process. Every dog learns at their own pace.
Positive reinforcement is your best friend here. Use treats to celebrate every little victory. A wagging tail is your cue for success! If your dog hesitates, don’t fret. Encourage them gently. The goal is to build trust and confidence over time.

Training Techniques
Training techniques can turn your backyard into a fun zone! Begin with simple commands like “sit” and “come.” Use treats as motivation. For jumps, start low. Gradually increase the height as your dog gains confidence. Consider using a dog training clicker for effective training reinforcement!
For weave poles, encourage them to zigzag with gentle guidance. Use treats to lure them through. Celebrate their efforts, even if it’s just a step.
Tunnels are often a favorite! Show your dog how to enter by tossing a treat inside. If they hesitate, coax them with your voice. Keep the atmosphere light and playful.
As your dog becomes more confident, gradually increase the difficulty. Introduce new obstacles or combine them for more complexity. Mixing things up keeps training exciting!
Always monitor your dog’s comfort level. If they show signs of fatigue, give them a break. Agility training should be fun! With time and practice, you’ll see improvement. Your pup will be leaping through hoops in no time!
Conclusion
Building a backyard agility course is a fantastic way to bond with your furry friend. It provides physical exercise and mental stimulation. Plus, it’s a creative outlet for both of you! Enjoy the process of building and training together. Each session strengthens your connection and builds trust. Don’t forget to capture those moments with a dog photography book!
Remember, the journey is just as important as the destination. Celebrate the little victories along the way. We’d love to hear your experiences! Share any tips or stories you have. Your insights can help fellow dog owners create their own agility adventures!
FAQs
What breeds benefit most from agility training?
When it comes to agility training, some breeds shine brighter than others. Active and intelligent breeds like Border Collies, Belgian Malinois, and Labrador Retrievers are the stars of the show! These pups have an innate desire to move and think. They thrive in dynamic environments where they can showcase their skills. Border Collies are known for their incredible speed and agility. They excel in courses that require quick turns and directional changes. Belgian Malinois are equally impressive, with their keen intelligence making them quick learners. Plus, they have a natural drive to work. Labradors, known for their friendly demeanor, also enjoy the challenge, making them perfect agility partners! However, don’t count out other breeds! Many mixed breeds and even smaller dogs can enjoy agility training. The key is finding the right obstacles that suit their abilities. So, if your pup is eager and energetic, agility training might just be the perfect match!
Can I build an agility course indoors?
Absolutely! If the weather isn’t cooperating or you simply want to keep the fun indoors, you can create a simplified version of an agility course using household items. Start with obstacles like chairs for jumps. Position them apart and use a broomstick as a jump bar. For weave poles, grab some water bottles or heavy jugs and arrange them in a line. Your dog can weave between them with style! Tunnels can be made from tables draped with sheets or blankets. Encourage your pup to crawl through using treats as motivation. Just ensure the space is safe, and there are no sharp corners or obstacles that could cause accidents. With creativity, your living room can become an agility playground!
How much does it cost to build a DIY agility course?
Building a DIY agility course can be as wallet-friendly as you want it to be! The overall cost largely depends on the materials you choose. On average, you might spend between $100 to $200 for a basic setup with jumps, tunnels, and weave poles. For budget-friendly options, consider using PVC pipes for jumps and weave poles. They’re inexpensive and easy to assemble! Old broom handles can serve as jump bars, while collapsible children’s tunnels can be found for around $20. Don’t forget to check thrift stores or yard sales for second-hand items. With a little creativity and resourcefulness, you can create a fun course without breaking the bank!
How often should I train my dog on the agility course?
Training frequency is essential for keeping your dog engaged and happy! Ideally, aim for 2 to 3 sessions per week. Each session should last about 15 to 30 minutes. This way, your dog gets enough practice without feeling overwhelmed. Short, focused sessions work wonders! Dogs tend to lose interest if training drags on too long. Keep it fun with plenty of positive reinforcement. Use treats, praises, and lots of enthusiasm to encourage them. As your pup becomes more skilled, you can increase the complexity and duration of the sessions. Just remember, training should be enjoyable for both of you!
Is agility training safe for older dogs?
Yes, agility training can be safe for older dogs when done thoughtfully! However, it’s crucial to consider their physical limitations. Older dogs may not have the same energy levels or agility as their younger counterparts. Start with low-impact obstacles. Avoid high jumps and steep ramps that could strain their joints. Focus on gentle movements, like weave poles or small tunnels. Always monitor your dog for signs of fatigue or discomfort. Consult your veterinarian before beginning any new training routines. They can provide tailored advice to ensure your furry friend stays safe and enjoys the experience. With the right approach, agility training can be a fantastic way for older dogs to stay active!
Please let us know what you think about our content by leaving a comment down below!
Thank you for reading till here 🙂
All images from Pexels